Feel the Fear & Do it anyway!

-How you ask?

fear7

Try the Dalai Lama way: Witness, acknowledge, allow, soften.

Find a quiet space, sitting comfortably, close your eyes, and go within.

Witness: Observe the feeling of fear as it arises
Acknowledge: Say to yourself “Fear is here”
Allow: Accept that Fear is already here, say “Fear is already here”
Soften: Make friends with Fear, non-judging, welcoming it’s presence

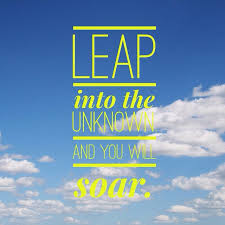
It’s not about having the perfect life or perfect conditions, it’s about being able to sit with what is, as it is, and still be content.

Stirrha Sukkha Asanam – Steady Comfortable Seat.

That is the true power of Yoga.

Thank you Jason Crandell & Andrea Ferretti for reminding me of that.

fear10

Full article @JasonCrandellYoga

http://jasonyoga.com/2015/04/19/a-simple-way-to-cope-with-fear/

“…the Dalai Lama once said, which is that he tries to make friends with the fear. This sage bit of wisdom has helped me tremendously.

You see, most of the time when we feel fearful, we instinctively take some helpful action to mitigate the fear. But…what do you do when you can’t take action to make things better? When you can’t just take control of the situation? In my situation, the question is, how do I “sit” with the fear of facing my mortality head on?

It’s times like these when we’re really called upon to do yoga. We take all of those hours that we’ve logged on our mats—breathing and moving, watching and responding—and put them into practice. The technique of making friends with fear has served as a little bridge to help me do that.

Here’s the internal map of why it helps me so much: For starters, it puts me in the role of observer, or what’s known in yoga as witness consciousness. I can see the fear as a separate entity from me and observe it, just like I watch my body during asana practice. I can see that it has an energy just like all my other emotions have different energies and effects. And I can witness how it’s causing me some pain. But I don’t have to be sucked into the loud screaming drama of fear just like I don’t have to put all of my focus and attention on the most difficult aspect of a pose. I can stand back and watch myself move through the challenging experience, whether physical or mental.

From that place of witnessing, I can start making friends with fear by acknowledging that it exists. The simple act of acknowledgment immediately defuses some of fear’s power. Instead of bracing myself and pushing against fear with my full body weight, I can stand and greet it eye to eye.

From acknowledgment comes acceptance. I allow the fear to be there. I don’t have to feel guilty or weak for my vulnerabilities. I don’t have to “warrior up” and conquer my fear. Fear is allowed to have its place in my consciousness from time to time. It’s allowed a seat at the table. I may not like the way it feels, but I can allow it to be there. And once I do that, I realize that I can handle it. Fear is not going to suffocate or drown me.

At this point – and this is the best part — I’m able to soften – inside and out. When I see fear as a something that I can make friends with, the energy of the emotion subsides a bit. It loosens its noose-like grip around my neck. My shoulders relax. My breath deepens. The fear itself is not so scary and angry and strange. It’s no longer an adversary, a scary black cat skulking around behind me – it’s actually quite sweet and scared and timid and normal. And I can feel that it needs what I need as I’m going through all of this – some love, some attention. A hug. A deep breath. A pat on the back. It needs some comfort. It knows that it’s got a crappy role in life, but it’s just doing its job, right?

When I soften, I’m in the true yoga space again. I’m present with the current reality – which is that I’m well. I’m not living in a hospital. And none of us knows how long we will live.

fear4

Now, I’m armed with a technique for when fear visits me again. I can repeat the inner mantra, “witness, acknowledge, allow, soften.” And you can, too. I hope it helps you with whatever fear you’re facing right now.” – Andrea Ferretti.

fear5Need some assistance in coping with a current life situation? Try an 8 week Mindfulness course with Niamh Barrett from Mindfulness Ireland. For info and support see http://www.Mindfulness.ie

Strawberries & Cream Quinoa Protein Bars

Have got to try these @theveganbarbie give them a go?!

fitminny

Nom nom nom! These were so good! Healthy, minimal ingredients, easy and protein packed! These can be enjoyed either chewy or crispy if baked longer. This first batch I decided to go for chewy and they were delish. Next time I am going to try a different flavor and make them crispy just to change it up! I love the base recipe and the fact that it can be changed to have so many other flavors is a major bonus. Quinoa is the base for these protein bars which greatly elevates their nutritional value compared to regular protein bars.

20131015-154028.jpg
1⃣In a bowl mix:
🔹2c cooked quinoa
🔹2sc vanilla protein powder
🔹1/4c buckwheat flour
🔹1T honey
🔹1t vanilla extract
🔹2T coconut oil
🔹4oz baby food pears
🔹1/2c flaked coconut
2⃣Swirl in:
🔹1c mashed strawberries
3⃣Spread (about 1/2inch thick) onto a cookie sheet with sides that has been lined with parchment paper…

View original post 27 more words

Vitamin B is for…

IMG_1323

…BIOTIN baby!

Learnt something new today…after a few days of craving Peanuts (specifically SNICKERS) and waking up with dehydrated, pinched, dry skin, I decided to purchase a bag of salted peanuts, and a bag of salted potato crisps. After which, I decided to purchase a packet of mountain trail mix, go home stuff my face and research the nutrient content of peanuts, and salt cravings. You know in the way that when you crave chocolate apparently you’re lacking in Magnesium, that kind of thing. No really, I’m just lacking in chocolate, thanks.

Mountain Trail Mix proved a delicious substitute for the Snickers that I really wanted to buy until I remembered that a. I’m vegan, b. I really want to eat foods that don’t have sugar, or Glucose Fructose Syrup, in them, and c. I’m not even pregnant so really can’t justify giving in to this Snickers craving (in the event of however, I shall eat a Snickers, or three, every day…loudly blaming the baby).

So why the peanut cravings people? Does the lack of chicken in my diet mean I’m lacking in something? I certainly feel tired, and in need of a facial!

Ever heard of Biotin?

Biotin is a B-complex vitamin that has been identified as a necessary nutrient for a century. It plays key roles in fat and sugar metabolism, has been proven to help in preventing diabetes, and is great for your skin. Best sources of Biotin are Peanuts and Tomatoes. Other good vegan sources include tofu, mushrooms, seeds, nuts and root vegetables. Yesterday I had sun-dried tomatoes for breakfast, and made a tofu-tomato-peanut stir-fry for lunch, so it sounds like Biotin is exactly what I’m lacking!

The image above is today’s dinner (still pre-research!): Stir-fried Tofu, Falafels, Peanuts, Walnuts, chilli sunflower seeds and Orange Pepper in Sun-dried Tomato Oil with Saffron.

Served with Romaine Lettuce, Chilli sauce, Tomato Chutney, Vegan Mayo, Home-made Hummus, Sun-dried Tomato Pesto, aaaannnnnnd…..drumroll please…Sun-dried Tomatoes!

Couldn’t get a better Biotin mix, unless of course I added mushrooms, milk and steak to it. Just kidding, kind of…Click here for a full list of vegan and non-vegan Biotin food sources.

Biotin is best absorbed with Vitamin B5, Pantothenic Acid, a little of which is found in most foods, and especially in my other favourite staple, Avocado. http://www.whfoods.com/genpage.php?tname=nutrient&dbid=87

These vegan days, I don’t have much opportunity to eat raw egg white, but just so you know, foods containing this (Ice-cream Snickers anyone?!) will nullify your body’s ability to soak up Biotin.

Another interesting fact; if you’re feeding a baby, increasing Biotin in your diet can help to prevent their cradle cap. See this page for more info: http://www.whfoods.com/genpage.php?tname=nutrient&dbid=42

As for the salt cravings, this article explains it really well, (ah, so that’s why I added chia seeds to my dinner today) http://www.mindbodygreen.com/0-14666/why-you-crave-salty-snacks-what-you-can-do-about-it.html

Am going to take a multi-vitamin, drink more water and no, am not preggo, just my body wishes it is.

PMT love, and peace 😉

What did you say?!

boy-hear

A short note on the importance of hearing and good ear health for children’s development. Enjoy 😉

Clear speech and ability to hear sounds is so important for children’s development, as I’ve discovered with my son over 5 years. His first year went great, then from 12 months on and especially when he was 18 months, he got a lot of ear infections.

In some children whose eustachian tube is flat and short, fluid which has built up during an infection doesn’t drain properly from the middle ear, causing deafness, and more ear infections. The eustachian tube usually grows by the time they’re 5, by which point, their ability to pronounce words and receive sounds will have been affected, so early intervention is critical.

Eustachian

Unfortunately I didn’t know -when my son was 18 months old- the importance of following up with his GP after the ear infection passed, to check that the fluid had fully drained out of the middle ear.

otitis-media

As we later found out, my son had fluid build-up in both ears, and was deaf right when the building blocks for speech and language were laid down.

I first started to notice his speech delays when he was 2 and a half. His peers had started to pronounce their words more fully, could construct intelligible sentences and generally make themselves understood, while the babble he’d begun as a baby continued just the same, and  as he rounded the corner towards 3 years proved more alarming than cute. While his friends were becoming easier to understand, I was still “translating” for him to friends and family. Why couldn’t he ask for a biscuit clearly?

It took some time to get an appointment with the HSE, who upon assessment, confirmed that he needed Speech & Language Therapy, back to a waiting list again. A private Audiology test confirmed he was deaf at this time (nearly 3 years). He had Grommets inserted at 3 years & 3 months, and again at 4 years after the Grommets fell out, the tubes did not grow anatomically, and the fluid built back up (deaf again).

He’s had Speech and Language Therapy since he was 3, both public and private (12 month wait for 5 sessions on the HSE!!). He now needs Occupational Therapy, and a Psychology Education assessment to determine what assistance he will need in National School. As you’ve probably already guessed, there’s a 12 month wait for this on the HSE, and the private one costs over €500 depending on where you go.

He’s a very happy kid and has filled in the gaps with his own creativity and imagination, God knows how much work he’s done to figure out what’s going on and what people are talking about! He still has a hard time distinguishing between different sounds and finds a normal classroom noise level “too noisy Mammy”. The day he got the Grommets in, as we drove home through town on a sunny afternoon with the windows rolled down, he freaked out upon hearing church bells ring, as he’d never noticed them before. He hears EVERYTHING now and is a great listener, but we often don’t understand what he’s saying and still translate what he is saying for others, though with ongoing Speech & Language Therapy this has improved. His behaviour and frustration levels have been affected by not being able to make himself understood. I don’t know the long term effects this will have on his social skills and ability to relate to others. To this end, we’re about to embark on the Hanen Programme, a bit late in the game seeing as he’s almost 5, but it can only help. I’ll write a review of it when we’re done!

If I had known when he was 18 months, the effect that ear infections could have on him, I’d have returned to my GP after each ear infection and checked his ears for fluid build-up, and also had a hearing test to confirm his ability to hear.

So now that you know; if you have a baby, or know someone with a baby that has had an ear infection, please get them to book a follow-up appointment with their GP and get a private hearing test if they have any concerns. €150 spent now could make all the difference to your child’s future.

And check out this great parenting website for more info on baby’s health:

http://www.babycenter.com/0_warning-signs-of-a-hearing-problem-in-children-12-to-36-mont_12292.bc

Image 1: http://nspt4kids.com/therapy/how-hearing-affects-your-childs-speech-and-language-development/

Image2: http://hearinghealthmatters.org/hearingviews/files/2013/10/Eustachian.jpg

Image 3: http://www.medindia.net/symptoms/images/otitis-media.jpg

Yoga for your Wrists – Part 1

Wrists

Reblogging here, Top 3 from Part 1, so you have all the stretches in one place.

1. Tadasana Wrists 

Set Up:

Stand in Tadasana, Mountain Pose. Soften your shoulders down your back, releasing any tension in your neck. Keep the back of your neck long. Draw your armpits down towards your hips, engaging your lower tummy, spine in neutral alignment. Raise your arms forwards to shoulder height. Arms straight, extend your wrists, so that palms face forwards, fingers point up to the ceiling. Push out into the base of your thumbs. Spread your fingers wide apart and draw your baby fingers back towards you.

Move:

5-exercises-at-work-wrist stretches

1. With your left hand, draw your right hand’s thumb back, and release. Repeat on the index finger and all the other fingers, one at a time. Then, draw all the fingers back together, except the thumb. Play with the stretch and see what feels good for you. Repeat on the opposite hand.

wrist stretches tadasana

2. Turn your palms outwards, 90 degrees clockwise. Press into the base of your thumbs. Turn your palms outwards another 90 degrees so that your fingers point to the floor.

3. Challenge: Stand with your feet together. Bend your knees, into a skiing position and contract your lower tummy. From here, keeping your arms straight (elbows facing forward), lower them until your fingertips touch your thighs, palms face the floor.

4. Repeat in Hero Pose:

Wrist stretch fingers on thighs

2. Wrists on the wall

Let’s use the wall for feedback. Repeat Stretch #1 standing at arms distance in front of a wall.

Set Up:

Press the heel of your palms into the wall, fingers pointing up to the ceiling, keeping your elbows straight as you perform the movements.

wrist stretch on wall

Move:

1. Turn your palms outwards, 90 degrees clockwise. Press into the base of your thumbs.

2. Turn your palms another 90 degrees so that your fingers point to the floor.

3. Turn your palms inwards so that the fingers face each other.

4. Walk the palms in and down towards the floor. Only go as far as is comfortable. You want to feel a challenge but no pain.

3. Wrists on the mat

Set Up:

Come onto all fours in Table Top on your mat. Knees parallel, hip-distance apart, tops of the feet are on the mat, heels in line with your knees. Place your palms on the floor, shoulder-width apart, middle finger in line with your shoulders.

Check that your hands are a little ahead of your shoulders, the farther forward your hands are, the less pressure that will be on the wrists, so move your hands forward and back until you find the distance that is right for you.

Spread out into the fingers, middle fingers point to the top of your mat. Spread the weight evenly into all fingers, and from the inner to the outer edges of your wrists.

If you have had an injury such as RSI or Carpal Tunnel Syndrome, only practice this move after swelling has reduced, making sure that there is no inflammation present and that you are happy to bear weight on the wrists. If you feel any pain, come off the mat and stay with the standing stretches.

Move:

a. Wrist Extension: 

Turn your hands inwards 90 degrees, fingers face each other.Turn your hands inwards another 90 degrees towards you (try one at a time at first), fingers face your knees.

Pretend to sit back onto your heels and press into the base of your thumbs, keeping your elbows straight. Feel that stretch?!

Then, move your upper body forward so your shoulders are in front of your wrists. Feel the inner edge of your wrist on the mat.

Come back to Table Top and turn your palms forward so fingers face the top of your mat again.

Turn your palms outwards 90 degrees, fingers face the sides of your mat. Turn your palms outwards another 90 degrees, fingers face your knees.

Wrist Stretch fingers to kneesSit back towards your heels and feel the stretch down the front of your arms as you extend your wrists. Move forward until your shoulder go beyond your wrists. Come back to Table Top.

Only go as far as is comfortable. You want to feel a stretch but no pain.

b. Wrist Flexion:

Wrist Stretch Table Top

Turn your palms facing up, so the backs of your hands are on the mat. Try it one at a time first, then both together. Fingers face forward towards the top of your mat.

From here, turn your palms inwards, 90 degrees anti-clockwise; fingers face each other. Turn them inwards another 90 degrees anti-clockwise, fingers face your knees. Feel the weight equally across from your baby finger to your thumb. Turn them another 90 degrees anti-clockwise, fingers face the edges of your mat.

Challenge: Move your upper body forward and back, feel the weight and stretch along your wrists as you press evenly into your baby fingers and your thumbs.

In Yoga & Pilates:

Every time your hands are on the mat, make sure your thumbs and index fingers are superglued to the floor, feel the base of the thumb and index finger on the mat. Press the pad of the tim down so you feel how the inner edge of your wrist is connected with the mat.

Pads of your palms press into the mat, hollow the middle of your palms up away from the floor. Spread your fingers out wide, away from each other. Middle fingers point to the top of the mat.

Look at your arms. You want the elbow creases to face  each other, rather than to the top of the mat. Then, draw your arms back up to your shoulders, plug the top of your arms into the Shoulder socket and slide your shoulder blades down to your back pockets.

Next time you’re in Table Top, Downward Dog, any arm balance…look at your thumbs and your index fingers, and ask, are they superglued to the floor?

Daily life: 

Notice how you use your wrists.

In the office: When using your computer, notice are your hands extended straight from your lower arms or do you bend at the wrists? Are you sitting tall, aware of your core when typing, or are you slumped in your seat, shoulders hunched, with your head 2 inches forward of your spine? For 5 days a week?!Yoga for your Spine

Try drawing your ears back so they are in line over your shoulders and relax your arms down by your sides. Then bend your elbows, hands forward, so that as you type, your palm base & wrists rest on the “WRIST REST”! (…ahhh, so that’s what that foam pad in front of my keyboard is for…) As you type, keep your elbows tucked in by your waist, broaden across your upper back, shoulder blades softening down to your back pockets. Allow your fingers to do the typing, keeping the wrists straight.

It’s amazing how something as simple as switching on your lower tummy muscles affects how you use your shoulders, and arms, all the way down into your wrists. Notice when driving, are you slumped in the seat, sitting back on your tailbone, or hunched over, clenching the wheel with your wrists super-flexed and knuckles white? Relax those shoulders and drive from your tummy button, not your wrists. Check out the straight wrists on this puppy. (Aww.)

Driving-to-puppy-park-l

If you cycle to work, notice how you cycle. Release this tense fingers gripping onto the handlebars! Actively lengthen the front of your body, engage your lower tummy and release your shoulders. Feel how your neck lengthens when you draw your arms back to your shoulder sockets and slide your shoulder blades down to your back pockets. Try to keep your wrists straight, in line with your lower arms, so your fingers hold the handle bars with ease, and you cycle from your centre, using your core muscles. Notice when you feel tension in the wrists. (White van driver cutting a left into your lane anyone?!) With the speed and alertness that commuter cycling requires, it’s no wonder we arrive at work with hunched shoulders and white knuckles! Take each red traffic light as a moment to allow your shoulders to soften, release your grip on the handlebars, and straighten your wrists. And in no time at all you’ll look like this guy:bike_to_work

He does look happy.

Try to attend a movement class, whether it’s Pilates, Yoga, or Somatics, at least once a week. One that focuses on safe alignment, tone and releasing tension, will help your wrists.

I didn’t even mention playing piano. Cat

Try the wrist stretches. Let me know how you get on. Remember, practice makes purrrfect. Sorry. (You can subscribe to Nora the Paino Cat on Youtube!)

Love your body, it can do amazing things.

Enjoy 😉

It’s all in the wrists

wrist stretch on wallWhether you’ve been doing cartwheels (please teach me how!) or typing all day, take the pressure off your wrists and lower arms with these 5 quick and easy stretches.

1. Neck & Shoulder Release

Tension in the neck and shoulders leads to tension in the arms and hands. So we’ll start here. Stretching your neck and shoulders every day, not only helps your upper limbs, but also improves circulation to your Brain. Lymph node drainage, thyroid function, and even your vocal cords benefit from supple flexible muscles in this area.

Method:

Allow your right ear to release down onto your right shoulder, taking at least a minute for allowing the ear to rest down towards the shoulder.Repeat on the left hand side. Yes the ear should touch the shoulder. Please send me a photo when this happens!

Next, bring your chin down onto your chest. Keep the back of the next long and imagine you’re holding a soft peach under your chin.

Lift your chin up to the sky, imagine you’re holding the soft peach behind your neck. Allow the front of your throat to soften and your shoulders to release. Take a few breaths here, then slowly lower your chin back to centre and draw your ears back over your shoulders. Lengthen up  through the crown of your head to the sky.

From here, bring your chin down onto your chest, roll it very slowly over to your right shoulder, back to centre, then over to your left shoulder. Do this a few times, moving with internal awareness, one millimetre at a time…slowly!

2. Flex your Prayer Pose:

Bring your palms together in Prayer Position in front of your heart.

Method:

Turn the backs of your palms around to rest against each other. Line up the backs of each finger and the back of the thumbs.

Anybody remember the rhyme: “Here is the Church, here is the steeple, look inside and see all the people” No, just me?!

Namaste back of palms facing

Draw the forearms down until your elbows bend at 90 degrees. Like Katy’s….

Katy Bowman Church Palms

Hmm…Don’t worry if this doesn’t come naturally!

Allow the sides of your neck to release, all the way down to the wrists, and out into the thumbs. The more often you do this stretch, the easier it will become.

3. Opposable Thumbs

“Opposable” means that the joint of the thumb allows the tip of the thumb to touch the tip of each finger on the same hand. It’s the only finger that can do that!

Method:

For fun, see if you can get your baby finger to touch each other finger on the same hand, one at a time. It won’t be on the tip, but try to make contact even on the side. Then try to get your ring finger, then your index finger to touch all other fingers one at a time. How easy or difficult it is to do it depends on the tension in your hands, forearms or even neck. Give it a try and remember to do both hands!

4. Bringing Namaste back

As I mentioned, tension in your shoulders can affect your arms and hands. This stretch helps to identify tight spots in your upper back and shoulders, and how to release them:

Method:

Back of hand on backStep 1: Reach your right arm behind you, bending your right elbow and place the back of your hand on your mid-back. Keep the arm straight across and hold here for one minute. Your lower arm will be horizontal, parallel to the floor.

Palm on back vertical

Step 2: Now, try to bring it vertical, so the hand travels towards the back of your neck and your elbow releases down towards the right hip. Try not to arch your back, keeping your pelvis and spine in a neutral Tadasana, standing position.

Palm on back

Step 3: Lower the arm back to it’s horizontal position (Step 1). Then flip your palm, so it rests against your back. Draw the arm up to vertical once more, keeping the palm facing onto the back and the shoulder blades drawing down your back.If the Shoulder Blade is winging a lot, i.e the bony edge of the shoulder blade is poking out of the skin, bring your elbow forward towards your front. Repeat Steps 1-3 on the left arm.

Paschima Namasarasana

Finally, reach both arms behind you and bring the backs of the hands facing each other, lowering the forearms until the elbows bend at 90 degrees.

Then, flip the palms, so that they face together in Reverse Prayer Pose (Pashchima Namaskarasana) behind your back.

See more on Pashchima Namaskarasana here.


5. Yoga for Wrist Strength: Read Part 1  here.

Wrist stretch fingers on thighs

Daily Life: Whole Body Movement

When moving your limbs in a pushing or pulling motion, remember that your strength and energy comes from the centre of your body, and travels outwards from here to the extremities.

Whether playing tennis, pushing a buggy, or reaching for the water cooler, try to move from your centre. Whole body movement brings strength to the muscle and takes stress off your joints.

The next time you’re raising your arm to reach out, visualise the movement coming from your tummy button out into your arms, extending down through the fingertips, and reach beyond, so you bring strength in your actions through from your core. Whatever you’re reaching for, always try to move from your centre. This is Whole Body Movement.

YouTube loves your wrists

Wrist Stretches: from http://www.smartstretch.com

Carpal Tunnel SyndromeI prefer an empty glass to a bucket of sand 😉


If you have any questions on wrist stretches or on the sequences we do in class, please leave a comment. If you try the stretches & they work, please click ‘like’! Your feedback is appreciated.

Enjoy 😉

(Revolved) Namaste


Sources and credits:

Katy Bowman, Alignment Matters. ISBN: 978-0-9896539-0-9

http://www.yogaartandscience.com

http://www.smartstretch.com

Lee Hayward

Vegan Breakfast: Porridge with…

…almond milk, cinnamon, blueberries, honey, hazelnuts, flaked almonds….whatever your vegan, sugar-free heart desires!

Image

I boiled mine up in a saucepan with water and almond milk, then added the blueberries when it was done.

Missing sugar? Sprinkle cinnamon on top. Of even better, add maple syrup and flaked almonds.

If you have little people, try adding bananas instead of blueberries. I found that some toddlers “don’t liiiike the pink berries”, and bananas are easier to hide 😉


40 Vegan Recipes… 1, 2, 3, Go Smoothies!

What better way to finish Lent than to share with you my top 40 vegan recipes…starting with the easiest…Smoothies!mango_banana_smoothie

First an overview. It’s been a long Lent. From Vegan Pancakes on February 18th to Vegan Easter Eggs tomorrow, I’ve enjoyed adapting to a new way of eating for nourishment and good health, keeping it fun, and where possible, family-friendly.

We made a lot more than 40 dishes, mostly salads to be fair, they still count as a meal! A lot of things are naturally vegan, you just need to read the back of the packets. Potatoes, pasta, rice…all vegan! Turns out my kids LOVE avocados, and CHILLI Hummus Crisps ?! Kale crisps not so much. Maybe when they’re older they’ll realise they taste great, with beer.

Lent started Vegan and sugar-free. 3 weeks of sinusitis, and exhaustion later, some changes were made. Vegan products containing sugar, and Tea with dairy milk, made a comeback. I started drinking more water, swapped Soya lattes for Guinness (There really is no difference in taste) and stocked up on Aloe Vera Juice, Plantago, Vitamins B6, B12 and Omega 6. I’ve really enjoyed being vegan…seriously, I really have!

Week 1: Who knew Goat’s Cheese and Honey aren’t vegan?!

Week 2: Bananas, Nut Butter and home-made Granola became a staple.

Week 3: Inexplicable cravings for chilli and ginger, and my skin dried out. Constantly feeling thirsty, my body definitely noticed it was on a detox!

6 weeks in: Better energy levels, and though I’ve needed to supplement vitamins, I don’t miss eggs or cheese, never really enjoyed eating meat & fish anyway, and have developed a healthy respect and, dare I say it, craving for herbal tea.

Ah the Tea. Normal Breakfast Lyons Green Label. Tried it with all the vegan milks. Only Koko won’t curdle. I’d rather go without Tea, than add a vegan milk. What’s learnt in childhood…

Overall, I feel lighter (4lbs, whohoo!) and enjoy feeling hungry in-between meals, that sounds weird, what I mean is that I look forward to my dinner! It’s hard to feel like you’ve overeaten in a vegan meal, and you need to plan ahead if you’re travelling.

Now for the rant. Skip over this part to the recipes below! You’ve been warned, this is the rant section.

As my family wasn’t going Vegan and I was still shopping for them, I tried to keep it simple. Then I started reading the ingredients lists on their food items…wow. Ow. Eye opener!!

The ONLY dairy yogurt I could find in a whole aisle  that doesn’t have modified anything in it, is Glenillen Farm. Solution? Buy them Vegan Yogurt. Which is great, except that Alpro Soya Yogurts are also full of modified delights and Glucose Fructose  Syrup, which is really bad for your Liver…so what’s the point in eating them, just to be vegan?

Sojade Yogurt is ok, I like the natural version, and their milk is lovely. Also like Koko milk and chocolate-flavoured Almond Milk! Supervalu has whole aisles dedicated to vegan foodstuffs, and Lidl is great for fresh veg. I shopped around a lot more, noticed price differences, & generally became hyper-aware of what I buy, how it’s produced, how lucky we are, how much food we have available that is fresh, healthy and delicious, and the choices I make when shopping for my family.

IMG_0984The Happy Pear Cookbook has a recipe requiring ‘unsulphured dried Apricots’ – when did Apricots start getting sulphured?! I found them by the way, in the Gourmet Shop, Rathgar. Produced by Crazy Jack, they’re delicious, expire in 14 months and last 2 weeks after opening, €5.25 for a 250g packet. They taste miles better that Tesco’s sulphured alternative, which expire in 6 months and last 1 week after opening.

And it’s not just dried fruit. Why does my kid’s sliced bread need sulphur dioxide in it?

Modified Maize Starch, Inverted Corn or other syrup and Sulphur Dioxide don’t NEED to be in my dinner, vegan or no.

And what if we didn’t eat dairy, nor vegan substitutes for dairy? Would we have need for massive refrigerated aisles in our supermarkets? Could we produce less CO2, resulting in less global warming, resulting in my son shouting less that “Mammy it’s sunny, now it’s hailstones, now it’s sunny again”…So eating and drinking more items at room temperature, not over cooking or cooling…except ice-cubes of course, global warming you have to make an exception for ice-cubes in my vegan smoothies….there’s a sentence I never thought I’d write!

Like I said, it’s been a long Lent.

Thoughts like these, noticing the difference between what we need to eat and what we think we want to eat, and how our choices directly affect Mother Nature retreating from our environment have entertained me along the way.

Going Vegan for Lent has changed the way I think about food and the way I use food, viewing food as fuel, something that nourishes me and helps me to take care of myself and my family. I would love to open a Vegan Deli, just so I could shop in there myself without having to check the ingredients list on the back of every packet!

What are the benefits of a Vegan Lifestyle?

Better buying choices, seeing food as sustenance and not craving dairy nor sugar. I’m richer, saving money on my weekly shop, eating out less, and have more confidence in cooking.

Though my family haven’t joined the crusade, the kids are eating better; swapping Muller fruit corners for home-made, sugar-free jam with real dairy yogurt, (thanks Glenillen for keeping it real!). They love helping with the baking, so long as it’s sweet and they can lick the spoon. We’re eating lots of vegan chocolate cakes. Being Vegan is Great! Might even keep it up after Jesus rises and walks on water…watch this space 😉

Thanks to The Hopsack Health Food Store in Rathmines for their Banana Man Smoothie, to Angie Jenkins @Fit4Life for her Almond Banana Smoothie. Thanks to Urban Health, Ranelagh for their Energy Boost Juice, to the Happy Pear, Greystones for their Vegan chocolate bars and the Natural Bakery for Vegan sliced bread. You’ve kept me going these last 6 weeks…Big shout out to Becky aka the Vegan Barbie for all her advice, recipes and brilliant Instagram pics (I WILL make an Acai Bowl!) And finally, thank you to the kind girl in Kanum Thai Rathgar who created a vegan satay dish for me for only €5.50, she knows me as the vegan peanut sauce lady. That’s peanut as in saucy, not crazy.

I haven’t mentioned the moral side of Vegan life as there’s plenty of info available for everyone to make up their own minds, but if you are thinking about going vegan and want to be tipped over the edge, check out great documentaries on Netflix like  Vegucated and any by Morgan Spurlock.

Let’s make some Smoothies…

1. Banana Man

Ingredients:

2 Bananas

200ml Apple Juice

1 Avocado

3 tbls Almond or Peanut Butter

2 tbls Sun-Warrior Chocolate Protein Powder

2 tbls Cocoa Powder

1 tbls Maple Syrup (to taste)

Water / Apple Juice / Almond / Koko milk

Ice cubes

Method:

Blend, Pour,  and serve.

2. Banana-Monde

Ingredients:

1/2 Banana

Punnet Raspberries

Handful of Green Grapes

1 Apple

2 tbls Ground Amonds

2 tbls Flaked Almonds

2 tbls Sun-warrior protein powder

1 tbl Raw Agave Syrup (to taste)

Water / Apple Juice / Almond Milk (as preferred)

Ice Cubes

Method:

Blend, Pour, Top with more flaked almonds and serve.

carrot smoothie

3. Energy Boost

2 Carrots

2 Oranges

1/2 Lemon

1/2 Lime

2 tbls Ground Almonds

Ice Cubes

Method:

Blend, Pour, Top with mint leaves and serve.

For more Carrot-Orange combinations see http://www.incrediblesmoothies.com/recipes/orange-carrot-smoothie-recipe-with-ginger/

For a Banana-fuelled life check out Freelee the Banana Girl! http://www.medicaldaily.com/freelee-banana-girl-eats-51-bananas-day-high-calorie-raw-vegan-diet-it-safe-276486

Enjoy 😉